07 Oct, 2022
Automatic Record Creation in Dynamics 365 when an email is received.
Posted on 07 Oct, 2022 by Admin, Posted in
Dynamics 365 Customer Service
Dynamics 365
Dynamics-365 Sales
 Blogs
Blogs
Summary :
In this blog we will discuss how to create case in Dynamics 365 automatically when an email is received using Automatic record creation and update rules(ARC) in Dynamics Customer Service Hub.
Step 1:
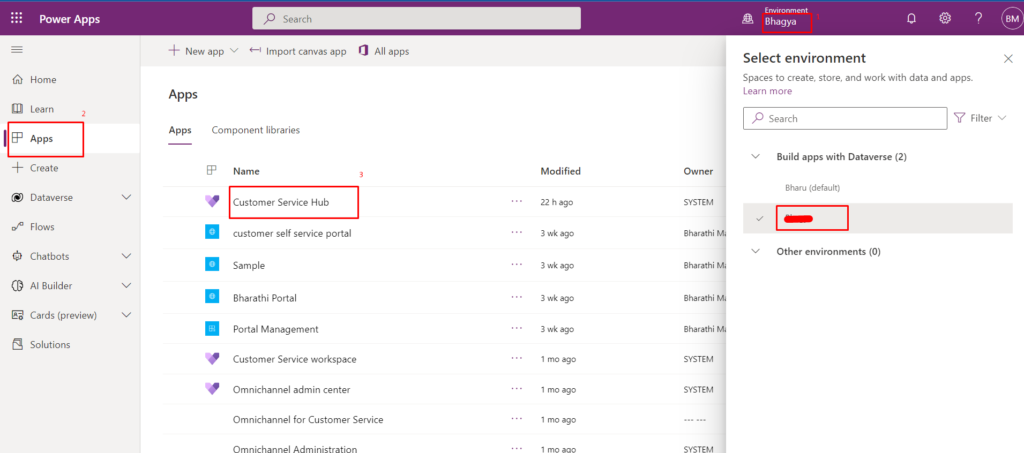
- Go to https://make.powerapps.com/ and sign-in.
- Select your environment and then select “Apps” from left-hand pane and then click on “Customer Service Hub”.
Step 2:
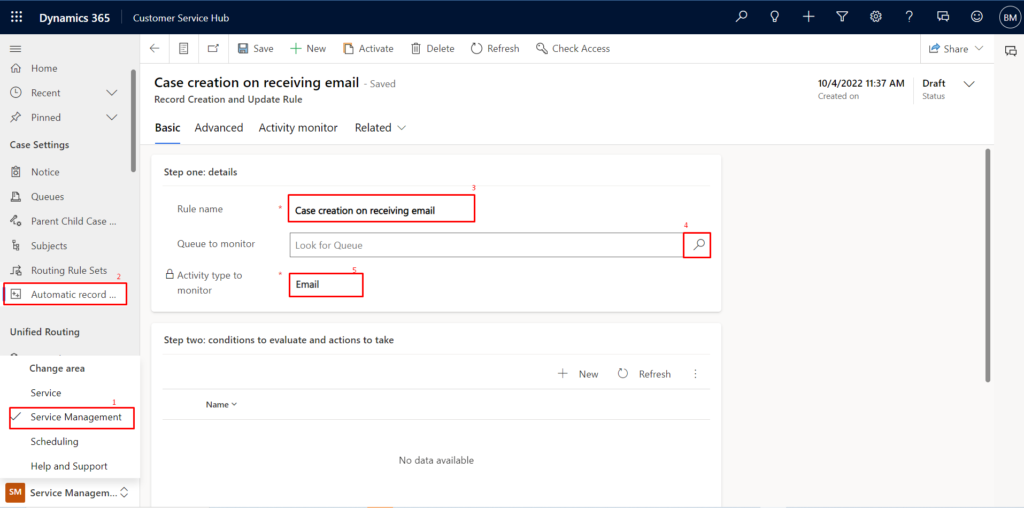
- Click on “Service” area at the bottom left and then select “Service Management”.
- Click on Automatic record creation and update rules(ARC) and then select ‘+New’ from the command bar.
- Enter “Rule name” and select the queue to monitor incoming emails and set “Activity type to monitor” to Email.
Step 3:
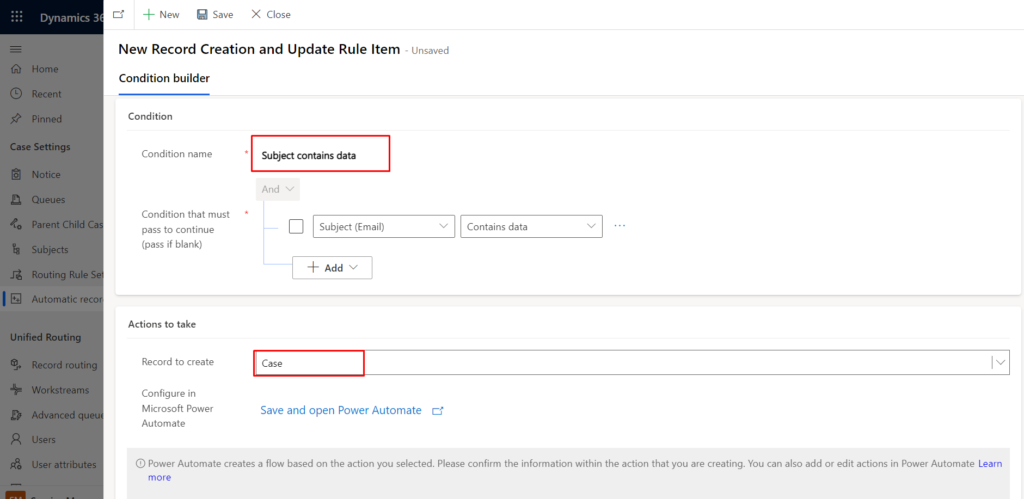
- Once the record gets saved you can add conditions and actions in “Step two” by clicking on ‘+New’.
- Now enter “Condition name” and then add condition if required or else pass blank if you do not want to add condition and in action select “case” entity from the drop-down in the “Record to create” field.
Step 4:
- Click on ‘Save’ button and if you want to add additional conditions click on ‘+New’ else click on ‘Close’ button.
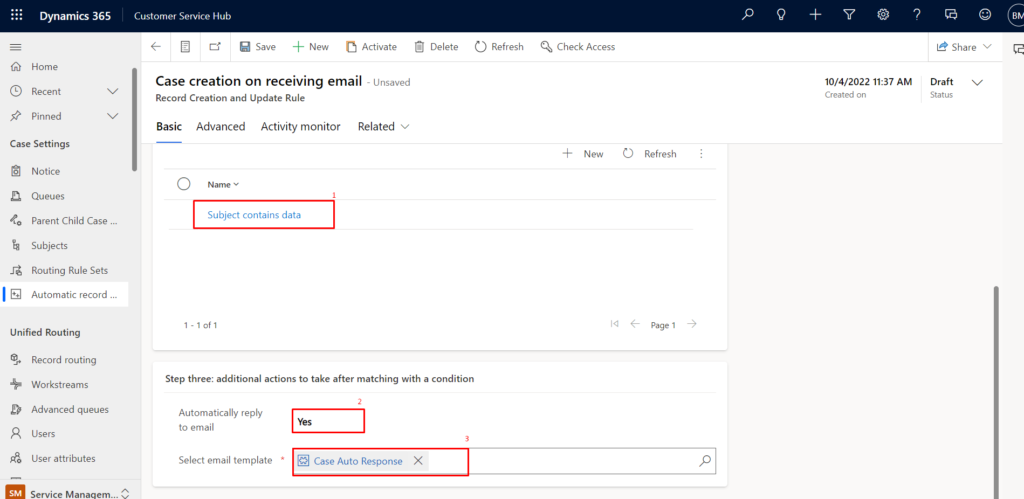
- In “Step three” you can add additional actions, if the conditions satisfy in Step two.
- If you want to send automatic reply after creating case, set “Automatically reply to email” to Yes and then in the “Select email template” select the template that will be used for sending auto response email.
Step 5:
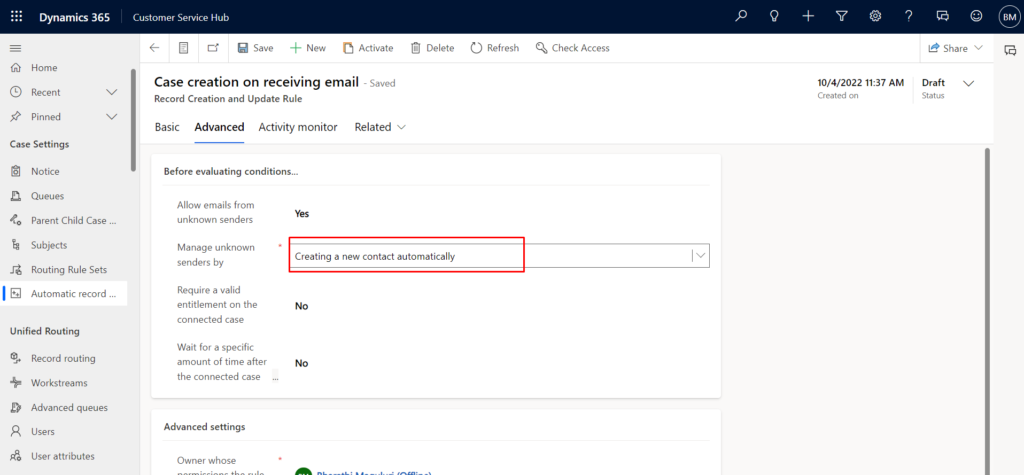
- Click on “Advanced” tab and you can select whether to allow emails from unknown senders / whether sender requires valid entitlement for the connect case/ wait for specific amount of time.
- If you select “Allow email from unknown senders” to Yes, “Manage unknown senders by” option will be available and “Creating a new contact automatically” will be populated by default. If needed you can change the option accordingly.
Step 6:
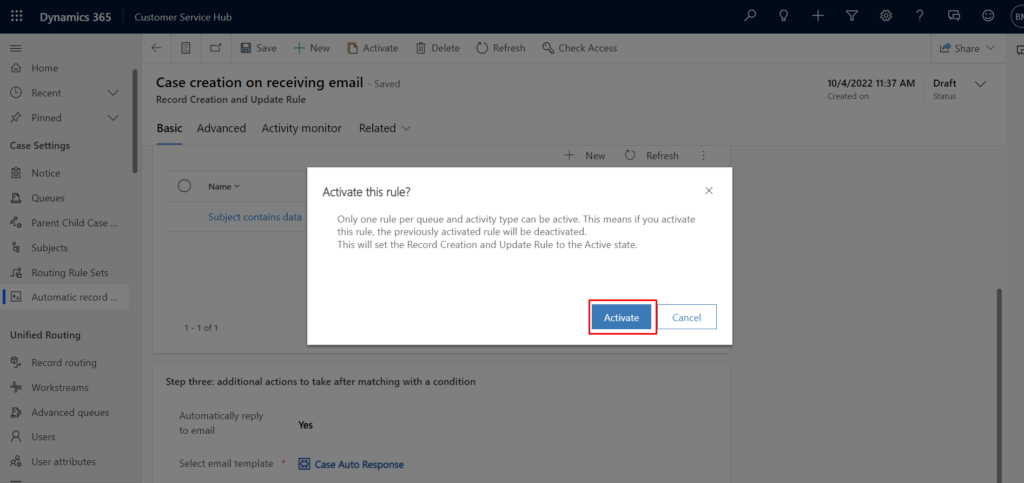
- After adding all the steps click on “Activate” button from the command bar.
- On click of “Activate” button you will get pop up that only one rule per queue and activity type can be active.
Step 7:
- When you send email to the queue email that have been added to ARC’s incoming email, the queue email will receive email from unknown/known senders.
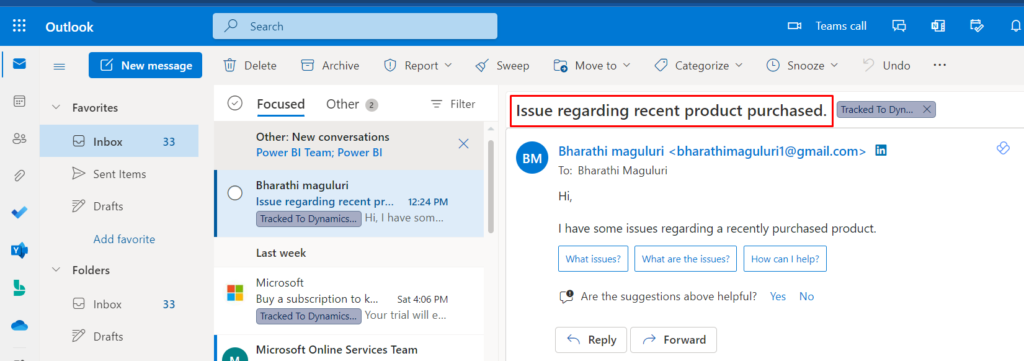
2. As you have set the “Automatically reply to mail” to Yes, in automatic case creation “Step three”, sender will receive an auto response.
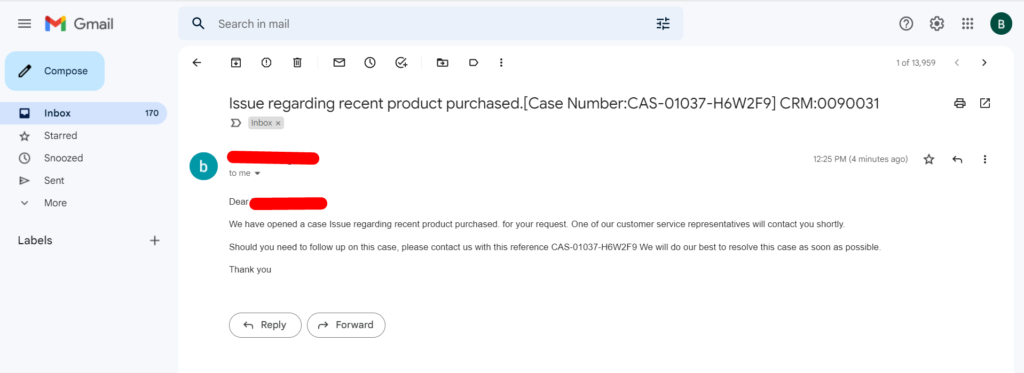
Step 8:
- When an email received, it will check whether the sender exists as account/contact in Dynamics 365. If the record is not found, it will create new contact record for the sender.
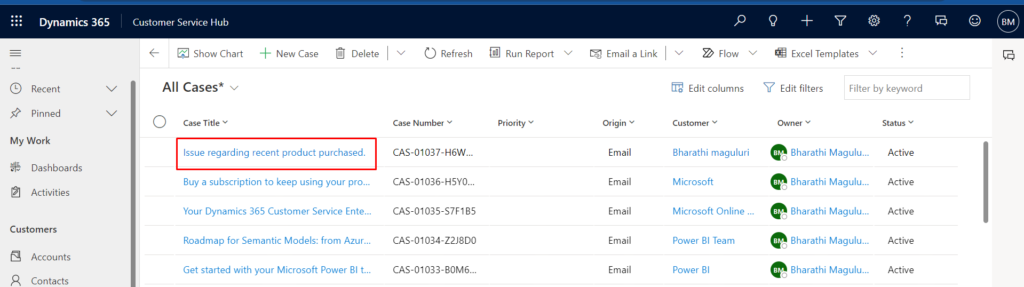
- In the screenshot below you can see that your case got automatically created in Dynamics 365.